| View previous topic :: View next topic |
| Author |
Message |
roverv8bay
Initiate Jedi

Joined: 14 Apr 2013
Posts: 38
Location: sunshine coast australia
|
 Posted: Sun Apr 14, 2013 6:07 am Post subject: aussie build rover v8 midmount 4x4 bay Posted: Sun Apr 14, 2013 6:07 am Post subject: aussie build rover v8 midmount 4x4 bay |
 |
|
G'day all I'm on the sunshine coast in Queensland Australia. I'm in the process of 2 bay rebuilds 1 for my daughter & son in law it will be ej22 powered but rest pure vw. Mine on the other hand will be out there. It's a 1976 windowed van 2 seater starting from behind the driver's seat is a rover v8 coupled to a Toyota hi ace 5speed gear box behind that is a Nissan 4x4 720 transfer case these in turn will connect to IRS Holden commodore diff centers.Im using stainless marine control cables between the box & hi ace shifter to clear the motor. I have a associate that owns a auto recyclers where the cars are only used for crushing makes it a cheap build so far g/box with shifter linkages tail shaft transfer case diffs radiator have cost me $200.00 aust plus the ej22 complete with harness & computer $250.00 good contact to have.
ernie
 |
|
| Back to top |
|
 |
roverv8bay
Initiate Jedi
Joined: 14 Apr 2013
Posts: 38
Location: sunshine coast australia
|
| Posted: Sun Apr 14, 2013 11:13 am Post subject: |
|
|
this is the steering arm relocated to clear diff[/img]
Last edited by roverv8bay on Fri Apr 19, 2013 10:05 am; edited 3 times in total |
|
| Back to top |
|
|
roverv8bay
Initiate Jedi
Joined: 14 Apr 2013
Posts: 38
Location: sunshine coast australia
|
| Posted: Sun Apr 14, 2013 11:16 am Post subject: |
|
|
Nissan 720 transfer case nice strong but compact 


the rodeo front spindles


 |
|
| Back to top |
|
|
splitbusvanatic
Jedi Master

Joined: 08 Oct 2006
Posts: 330
Location: Co. Mayo, Ireland
|
| Posted: Sun Apr 14, 2013 7:11 pm Post subject: |
|
|
That looks like a big job.
Really looking forward to This build. |
|
| Back to top |
|
|
roverv8bay
Initiate Jedi
Joined: 14 Apr 2013
Posts: 38
Location: sunshine coast australia
|
| Posted: Mon Apr 15, 2013 11:30 am Post subject: |
|
|
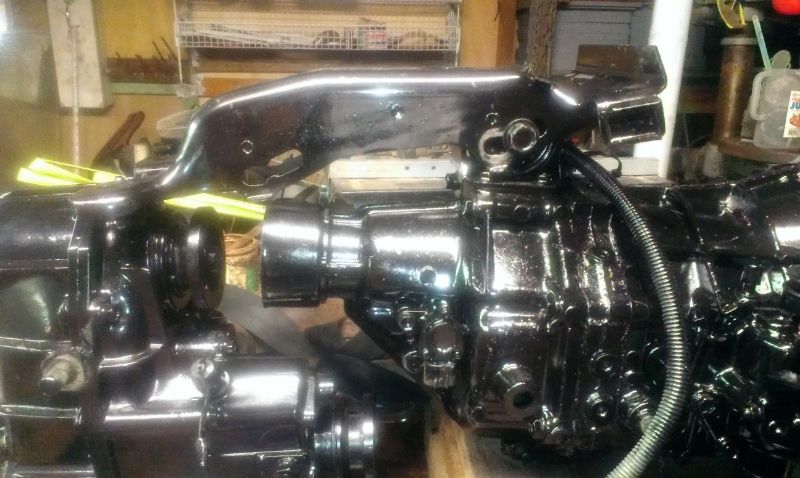
G'day all. picked up 5 speed today. A wash & rattle can rebuild. this is how the 2 transmissions will sit up.


Last edited by roverv8bay on Sat May 04, 2013 9:41 am; edited 1 time in total |
|
| Back to top |
|
|
Superleggo
Jedi Master
Joined: 12 Nov 2009
Posts: 359
Location: United Kingdom
|
| Posted: Mon Apr 15, 2013 9:31 pm Post subject: Great build |
|
|
This looks great fun. I like the transfer box. Very neat unit.
I am looking forward to watching your progress
Good Luck |
|
| Back to top |
|
|
roverv8bay
Initiate Jedi
Joined: 14 Apr 2013
Posts: 38
Location: sunshine coast australia
|
| Posted: Mon Apr 15, 2013 11:53 pm Post subject: |
|
|
G'day superleggo. just decided as everyone has a name for there kombi that's usually a boy or girl name I'm going to it ECLECTIC because it's a collection of everything it's got Chinese Australian English Japanese pats to start with have to find some thing European maybe a Peugeot horn & and something American maybe a set Mickey Thompson tyre's. here are bits for it. The blue item's are the oil cooler fitting's needed to give me room to fit everything in the electric water pump same reason the gauges are digital oil pressure oil temp water temp volt's the LED lights contain park & blinker I'm filling in the vent & blinker's on the front panel so will recess the light's into front bar note the subaru impreza cup holders a must have & so easy to fit but make sure if you all out there buy from wrecker's to get the side panel's they slide in. Will post pics of the kombi it's self next week when I'm down on the gold coast it's 185klms from home bit of a pain in the butt. No where to put it at home yet all the best to everyone out there stay safe
Ernie
Last edited by roverv8bay on Wed May 15, 2013 10:03 am; edited 3 times in total |
|
| Back to top |
|
|
roverv8bay
Initiate Jedi
Joined: 14 Apr 2013
Posts: 38
Location: sunshine coast australia
|
| Posted: Tue Apr 16, 2013 4:57 am Post subject: |
|
|
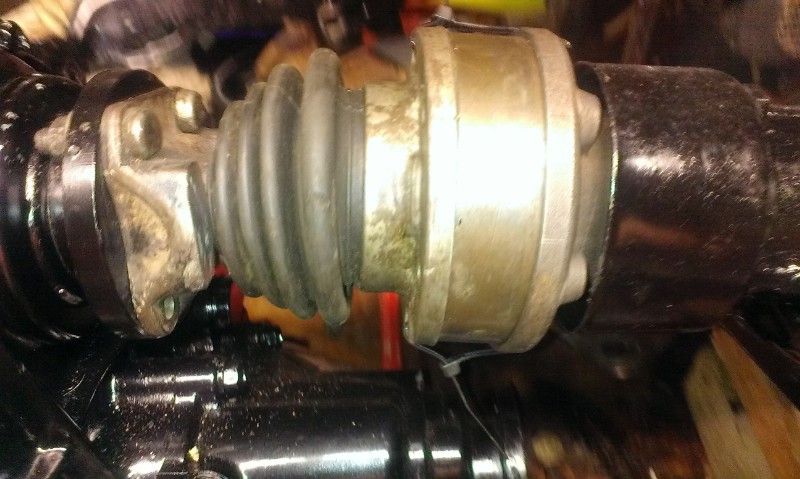
G'day again just picked up the intermediate shaft still to be welded but needed it to check for length etc so here it is kombi axle Nissan drive flange Toyota out put yoke next to done to fit onto kombi drive flange it in bit's & together. The small tail shaft is the original nissan intermediate shaft. I probably could have just had it shortened but still a bit long. So 1 step closer to all the mating bit's


 |
|
| Back to top |
|
|
roverv8bay
Initiate Jedi
Joined: 14 Apr 2013
Posts: 38
Location: sunshine coast australia
|
| Posted: Fri Apr 19, 2013 10:23 am Post subject: |
|
|
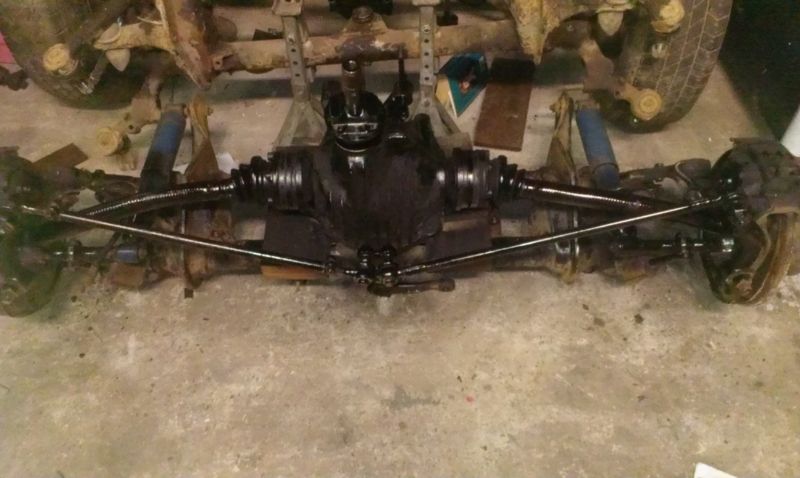
G'day all playing with front diff set up. this should be easy to do I will bend up a 5cm pipe to bolt between the chassis rails to hold drive flange end on rubber mounts and use the commodore rear mount onto beam. in the back ground of the 1st pic is complete bay rear suspension to set up diff in look closely & you will see my original datsun180b diff set up but it was to long to fit tails shaft & possibly a bit week. If you look at the pinion flange you will see the Nissan uni joint flange the locating flange size is identical so just need to drill 4 holes to bolt up Nissan shaft you will notice the clearance on the relocated steering & diff also the nut's not tight on tie rod's but still room the axles look bent because they are rubbr hose to check clearance on shocks etc plenty of room alround


more next week
ernie
Last edited by roverv8bay on Sat May 04, 2013 9:46 am; edited 1 time in total |
|
| Back to top |
|
|
roverv8bay
Initiate Jedi
Joined: 14 Apr 2013
Posts: 38
Location: sunshine coast australia
|
| Posted: Thu Apr 25, 2013 3:58 am Post subject: |
|
|
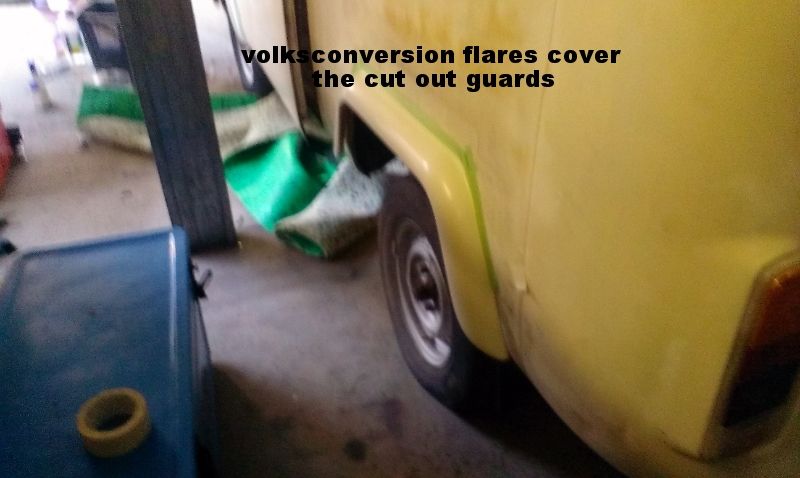
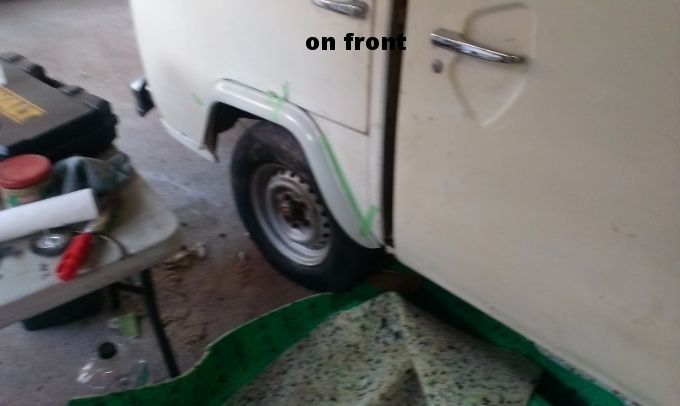
G'day all not much happening in shed to day It's ANZAC DAY been & marched now just relaxing some pics of van



 |
|
| Back to top |
|
|
roverv8bay
Initiate Jedi
Joined: 14 Apr 2013
Posts: 38
Location: sunshine coast australia
|
| Posted: Sat Apr 27, 2013 5:00 am Post subject: |
|
|
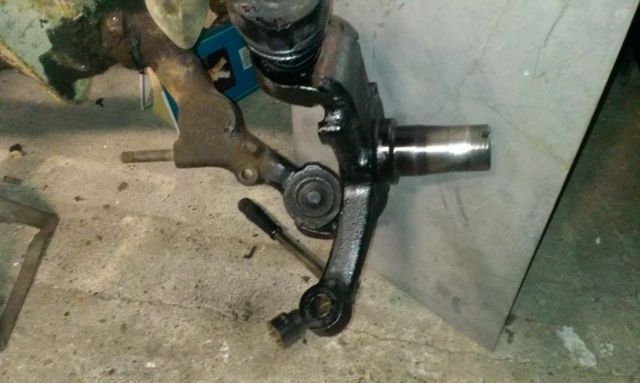
G'day all. pics of spindle it doesn't give enough adjustment so engineer is looking at moving bottom hole over so off we go. I'm going to have the beam spread to allow for extra length of spindle had to wait to see if that would be the case
ernie
 |
|
| Back to top |
|
|
roverv8bay
Initiate Jedi
Joined: 14 Apr 2013
Posts: 38
Location: sunshine coast australia
|
| Posted: Sat Apr 27, 2013 12:29 pm Post subject: |
|
|
G'day all spent some time measuring & found the lower arms where the problem is are longer than the top so if I can sort out shock mounts for them I hope it will give the adjustment required into stripping both spare beams when I get time
ernie |
|
| Back to top |
|
|
|


 FAQ
FAQ Search
 Memberlist
 Usergroups
 Register
 Profile
 Log in to check your private messages
 Log in


